Photoshop Tutorial: Create amazing portal effect
With the spare time I've had, I've been perfecting the technique of making an appealing portal in Photoshop. The technique borrows some aspects from other tutorials, but the end result is awesome. You can follow these steps to get a similar result.In Photoshop, make a new document by going to File > New and set width and height at 1000px.

Ok Let’s get started!
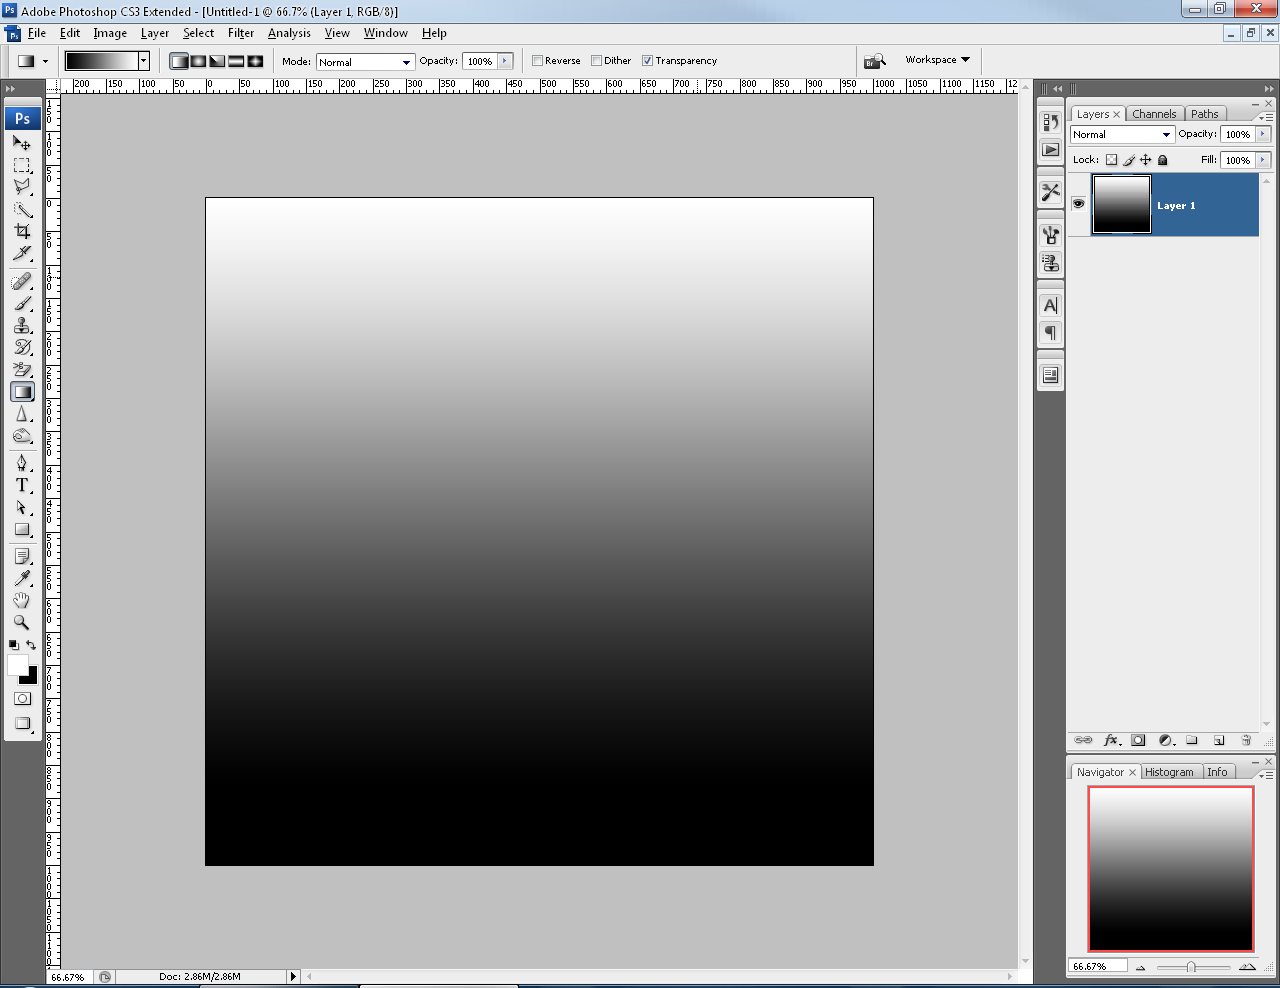
Select the Gradient Tool and make a linear white-to-black gradient. White should be near the top and black should be near the bottom. There should also be more black than white as seen in the screenshot.
Then, go to Filter > Distort > Wave. Make a square wave with 50 generators using the settings in the screenshot.

After that, go to Filter > Polar Coordinates. Use the Rectangular to Polar option and click OK.
The layer should now look like a starburst.

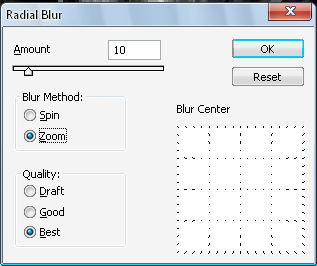
The distortion leaves the layer slightly pixelated. This can be removed by applying a light Radial Blur filter.
Go to Filter > Blur > Radial Blur, and use the following settings:
That finishes the first layer. Now make a new layer and use the gradient tool. This time add more black and less white.

Use the same filters as before. Distort with Wave first, then Polar Coordinates. The result will be a smaller burst with significant white streaks. Leave it as it is for now.

You may add more layers of different bursts but these should be enough. Make a new layer again and select the Brush Tool. Right-click on the canvas and change the settings. Use a circle brush with 300px diameter and 25% hardness. The color should be white. Click near the middle. Because it's unlikely that you'll hit the center, select all with Ctrl+A and select the move tool. Alignment options should appear in the tool options tab.

Select align vertical centers and horizontal centers. That should perfectly center the circle. Now duplicate the circle layer (Ctrl+J) and invert it (Ctrl+I), Now go to Distort > Wave and change the number of generators to 10. It should break apart the circle.

After that, go to Stylize > Find Edges. It should outline the distorted circle with black and make all black, white. Follow that up with another Polar Coordinates filter.

The result should now be a blocky shape below the center. Duplicate the layer and select all. With the duplicated layer selected, go to Transform > Flip Vertical. That will make both halves similar. Merge the two layers.

Now duplicate the two parts and rotate one. Just rotate it slightly so it is not horizontally symmetrical. Take the duplicated layer, make it larger, and rotate it differently. The result should look like the screenshot now:

Make another new layer and go to Filter > Render > Clouds. Adjust the black and white levels by opening the levels window (Ctrl+L). The goal is to create a high-contrast render with notable white and black spots. After that, go to Pixelate > Mosaic, and set the Cell Size to 32. The layer should now look like the screenshot:

Now go to Stylize > Find Edges. This outlines each square. Invert the image and apply another Polar Coordinates filter. There is still one more layer to add. Make a new layer and select the white-to-transparent gradient. Set the style to a reflected gradient and draw it in the center.

Apply Polar Coordinates again. Make another new layer and create another reflected gradient only this time larger than before. Apply Polar Coordinates and size up the layer. The ring should be visible in the 4 corners of the canvas. Finally, duplicate the first, smaller ring and shrink it so it is near the center. It should now look like the screenshot:

After that, the coloring comes in. Click on the topmost layer and go to Layer > New Adjustment Layer > Gradient Map. In the gradient color editor, make the left color black or a dark color and the right color white. The color is up to you but I will use blue as an example.
This is how my gradient map looks like:

The gradient map can always be edited so click OK to apply the changes. Now the layers have to go through each other. Select the black layer with the squares and set the blending mode to Screen. Select the two rotated black square layers and set it to Screen. Finally, select the small burst from the second layer and set it to either Screen or Linear Dodge.
Duplicate the small burst layer and transform it. Enlarge it so it becomes more noticeable. Rotate it as well.
It should look like this now:

This leaves the layer blurry. Just like before, apply a Radial Blur filter to fix it.
The portal is now complete! You can always go back and edit layer or change the color via gradient map.
This is my final product.

Posted by , Published at 8:44 PM and have
0
comment


 m
m
No comments:
Post a Comment