
Ok Let’s get started!
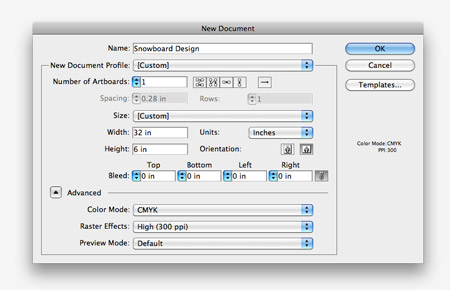
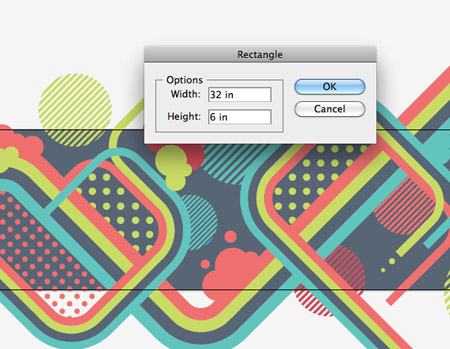
A typical snowboard deck comes in at 64x12inches, but with the design being created in vector format we can easily scale this to 32x6inches to ease the strain on our processors. Create a new Illustrator document at the appropriate dimensions and select CMYK for the Color Mode.
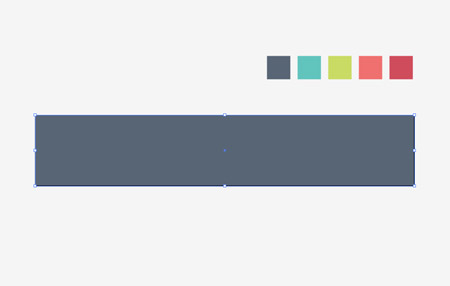
One of the first steps is to plan out a colour scheme for the design. I’ve picked out this cool palette from ColourLovers which has a good mix of bright tones as well as a dark blue which would work perfectly as a background. Select the rectangle tool and click on the artboard. Enter the dimensions of 32x6inches and align the rectangle with the Align palette. Press CMD+2 to lock this element to avoid accidentally selecting it.
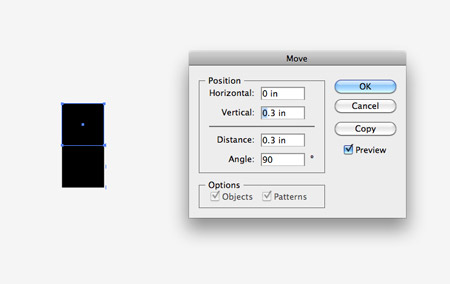
Elsewhere on the document create a small square, note the dimensions, then Copy (CMD+C) and Paste in Front (CMD+F). Hit the Enter key to bring up the Move options and input the same value as the square’s height in the vertical field. Press the Paste in Front shortcut then CMD+D to repeat the move transformation until you have a row of four squares.
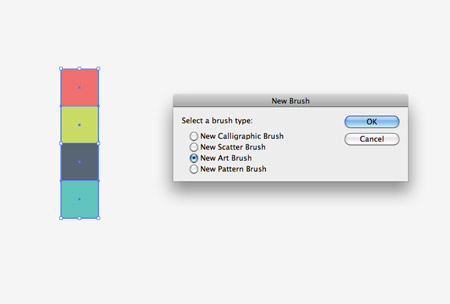
Fill each of the four squares with a swatch from the colour palette, then with all four squares selected click the ‘new’ icon at the bottom of the Brushes palette. Select New Art Brush in the subsequent options box.
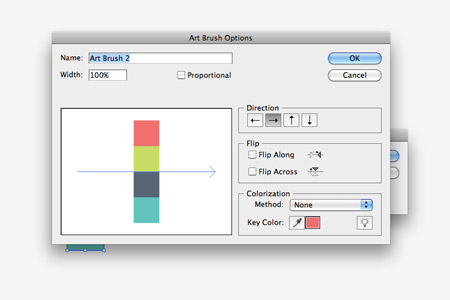
Make sure the direction arrow is flowing across the squares, then click OK to create the new brush.
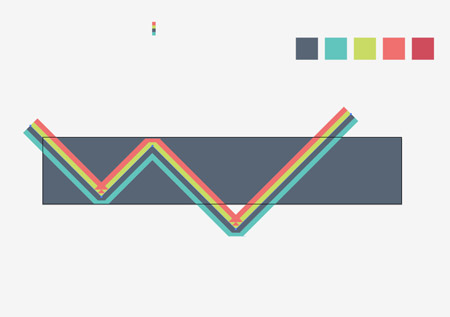
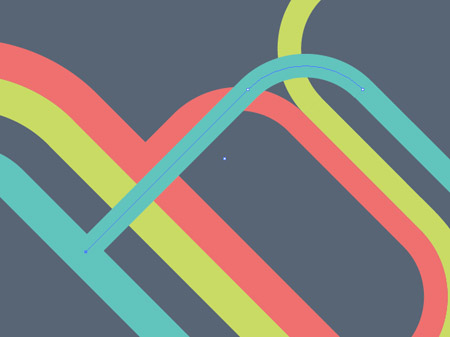
Use the Pen tool to draw a zig-zagging path across the design. Hold Shift to constrain the angles to 45 degrees. Add the newly created brush as the path’s stroke.
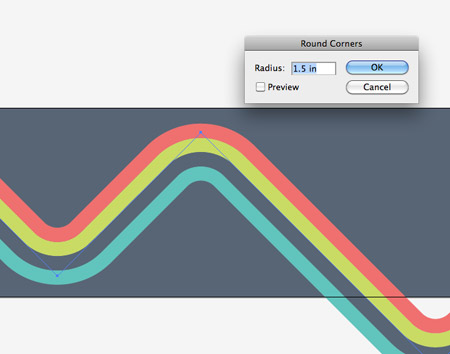
With the path still selected, go to Effect > Stylize > Round Corners. Enter a Radius of around 1.5inches to transform the angles into smooth bends.

Continue drawing a couple more lined paths with the same round corner styling. Decrease the stroke weight to create thinner paths.
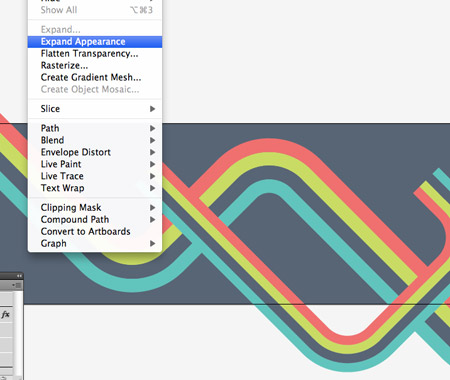
To transform the paths into solid and editable shapes, select each one and go to Object > Expand Appearance.

Use the Direct Selection Tool to tweak the edges of each coloured strip so each one ends at a different point. Keep the Shift key held to constrain to that 45 degree angle.
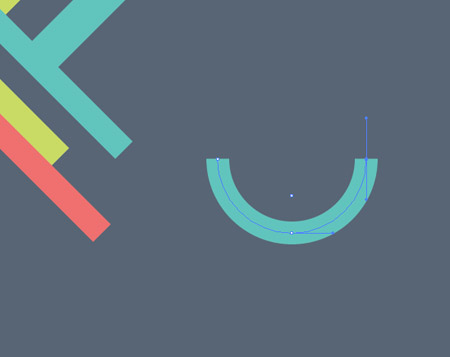
Draw a circle on the artboard and add a thick stroke. Aim to match the weight of the stroke perfectly with the size of the coloured strips. Use the Direct Selection Tool to delete out the top and right points to leave a quarter-circle.

Zoom right in and match up the curved strip with the straight strips. Extend the straight edges after the curve by continuing the path with the Pen tool.
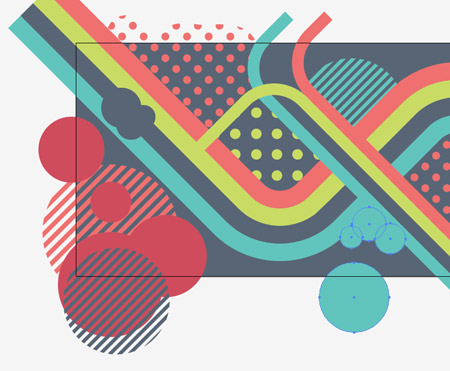
Cool effects can be created by varying the stacking order of each strip, and overlapping the colours so they seem to seamlessly flow between each path.
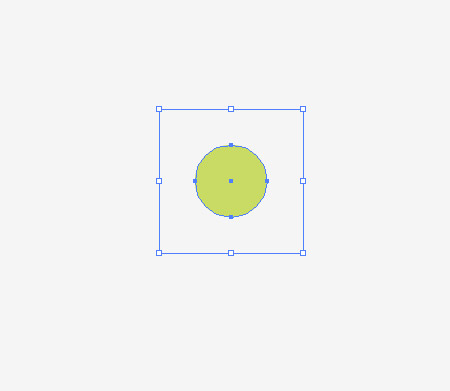
Elsewhere on the document draw a small circle and fill it with a colour from the design’s colour scheme. Draw a slightly larger blank square around the circle and align the two perfectly. Select both objects and drag them into the Swatches palette.
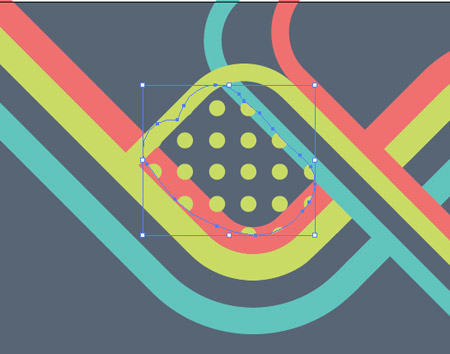
Use the Blob brush to fill a selection within a closed area of the design and add the newly created swatch as a fill. The swatch will repeat to create a repeating pattern swatch. Repeatedly press the shortcut CMD+[ to send the pattern underneath the linework.
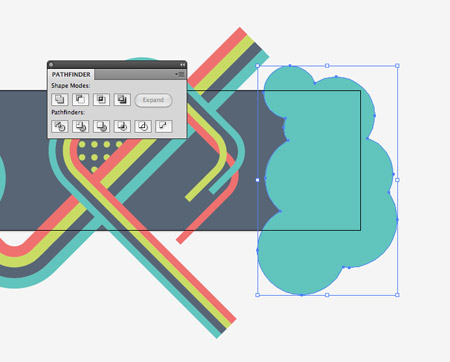
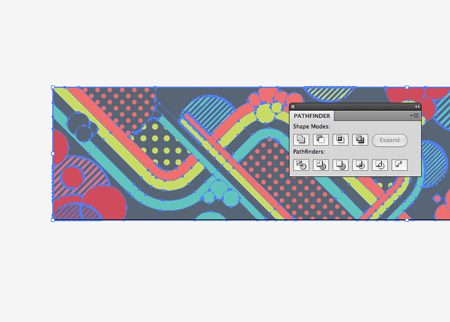
Draw a series of filled circles on one end of the design and merge them all together with the Pathfinder tool.
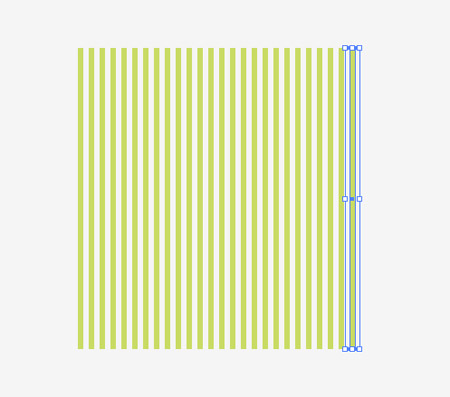
Draw a long thin rectangle elsewhere on the artboard, then duplicate it by dragging while holding the ALT and Shift keys. Press the shortcut CMD+D to create a series of lines.
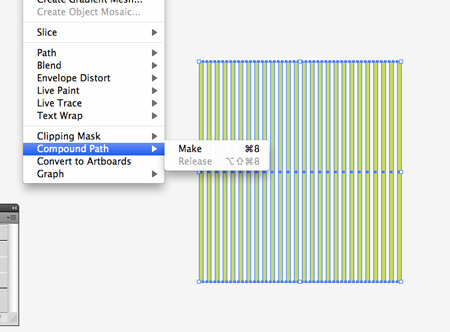
Select the series of rectangles and go to Object > Compound Path > Make. This allows them to be used with the Pathfinder in the next step.
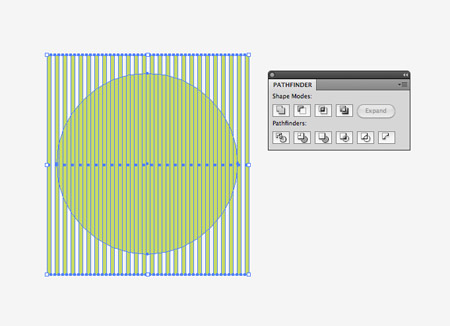
Draw a circle in the centre of the rectangles, then use the Intersect option from the Pathfinder to clip the rectangles to the confines of the circle.
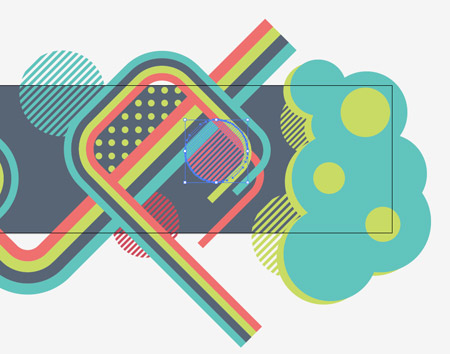
Use copies of these circle graphics in various colours to decorate the design. Alter the stacking order using the shortcut CMD+[ to allow the circles to creep in from behind other objects.
Study the design for blank spaces or gaps and fill them with various shapes and graphics. A few simple circles overlapping over areas of the same colour can create a cool effect.

Sticking to the simple 5-colour palette will allow same colour elements to blend together and balance the design with the same series of colours flowing across the whole board.
When the design is complete, group all the elements together. Don’t forget to press CMD+Alt+2 to unlock that background rectangle. Add a blank rectangle over the design and align it centrally with the artboard.
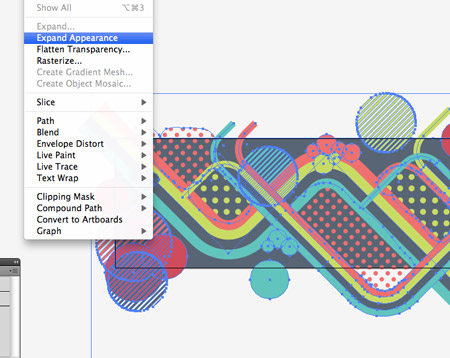
Select the group of elements and go to Object > Expand Appearance to convert any remaining paths and strokes to solid objects.
Select both the group of elements and the blank rectangle then hit the Crop option from the Pathfinder palette to trim everything down to size.
That leaves one completed snowboard deck design. Paste the design into a template supplied by your printer to finish off the artwork as a print ready file.
Posted by , Published at 5:54 AM and have
0
comment


 m
m
No comments:
Post a Comment