Ok Let’s get started!

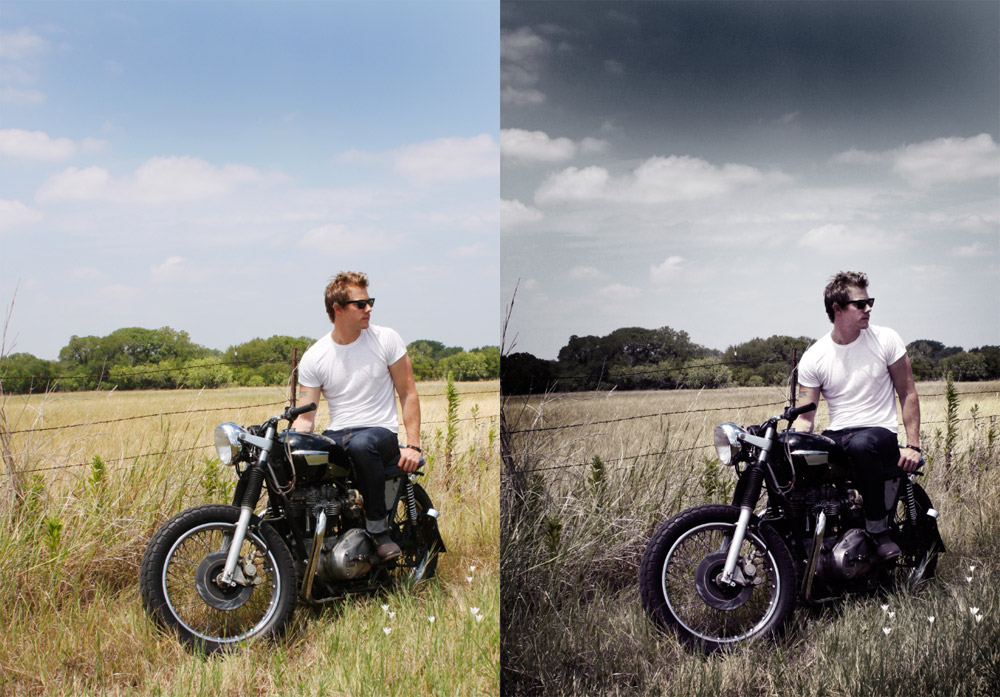
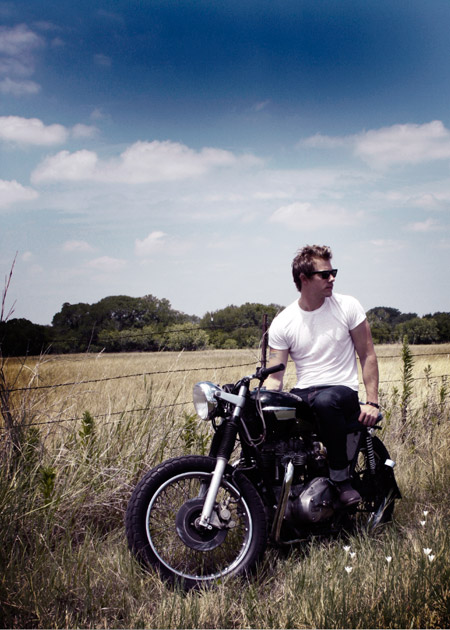
Begin by opening your photograph of choice into Adobe Photoshop. This particular shot is courtesy of ThinkStock and features a guy on a motorcycle with a blue skies and grassy fields.

Go to Image > Adjustments > Levels and tweak the tones of the image. Match the shadows to match the histogram graph and clip the highlights to brighten up the whites.

At the bottom of the Layers palette, click the Adjustment Layer icon and select Curves. Change the drop down menu to select the Red channel and adjust the curvature of the graph.
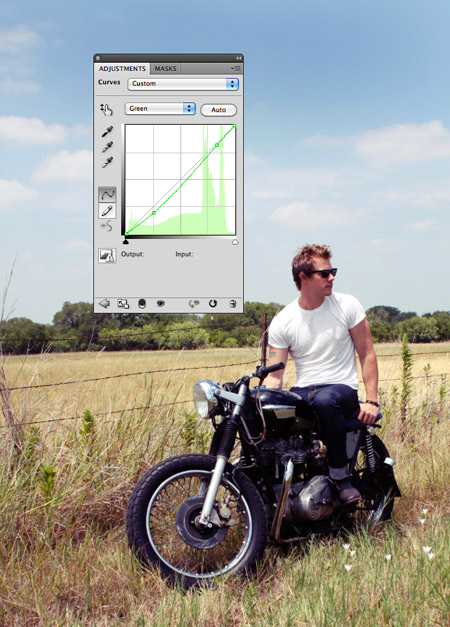
Change the drop down menu to Green and tweak the graph for the green channel to further alter the tones of the image.
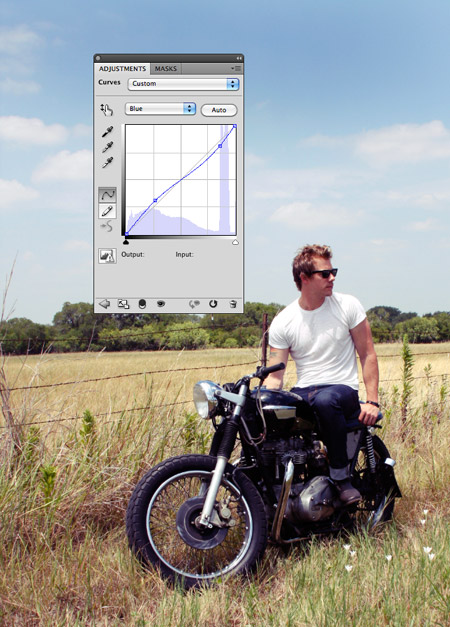
Finally alter the Blue channel, creating an inverted ‘S’ shape to enhance the blues to give a cool colour cast.
Go to Edit > Select All, then Edit > Copy Merged. Paste this new layer at the top of the layers stack, go to Image > Adjustments > Black and White then change the blending mode to Darken to mute the tones of the effect. Adjust the opacity of this layer to around 70% to bring back some of the colours.
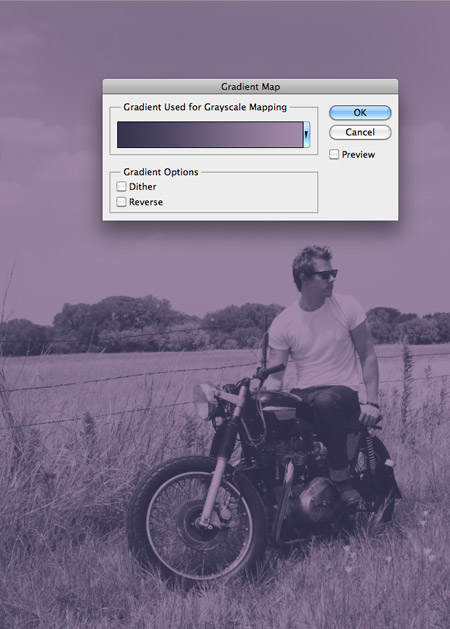
Paste another duplicate of the image on a new layer. Select a dark and light purple for the foreground and background colours of the colour picker, then go to Image > Adjustments > Gradient Map. Change this layer’s blending mode to Hard Light at 50% to add a purple colour cast across the photograph.
Fill a new layer with black and change the blending mode to Overlay. Add a Layer Mask to the layer and use a large soft brush to erase out the Overlay effect from the main focal point of the photograph, which is the man and motorcycle. This then leaves darker tones around the edges of the document as a pseudo vignette.
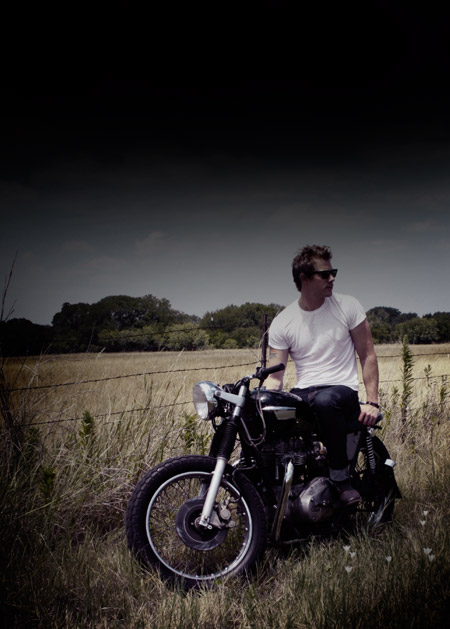
Paint more black areas across the image with a large soft brush on a new layer, specifically across the sky and lower corners. Change this layer to Colour and reduce the opacity to around 75% to subtley desaturate the colours from these areas.
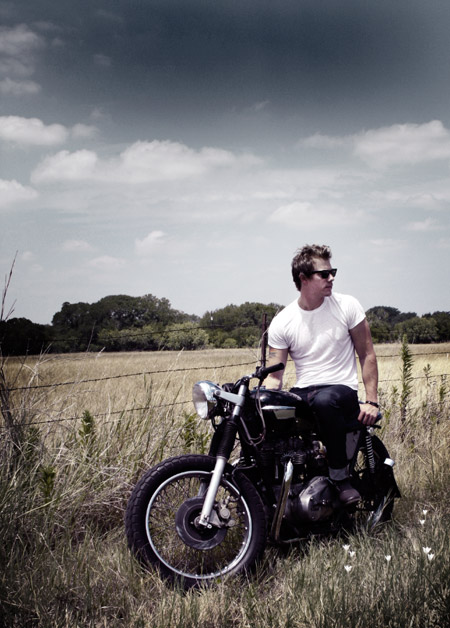
Duplicate the whole image once again using the Select All / Copy Merged commands, then make any final adjustments to the tone of the photograph using the Dodge and Burn tools at a low opacity. Areas of the face have been Dodged to brighten them up in order to emphasise the focal point, whereas the shading of the t-shirt, arms and chroming on the motorcycle have been burned to increase the contrast.
The final photo effect has that cool processed appearance with the off-colour casts, unusual saturation and vignette burns of traditional Lomo photography. Compared to the original the new photo effect is much more intense with a dark atmosphere – Perfect for any kind of magazine fashion spreads, advertisement designs or rock band group shots.
Posted by , Published at 10:27 AM and have
0
comment


 m
m
No comments:
Post a Comment