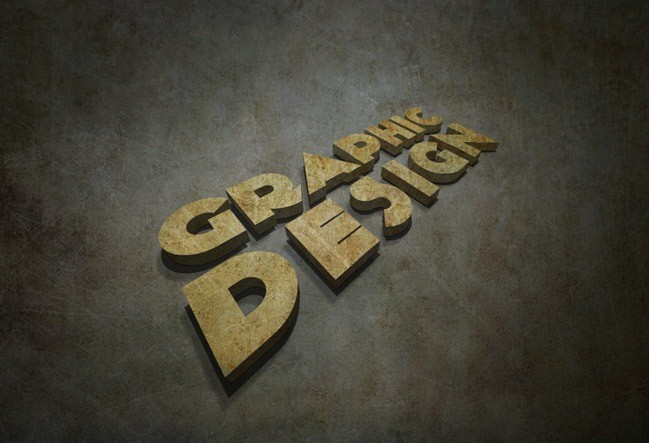
 Click here to see the full sizeOk Let’s get started!
 Step01 – Illustrator
Required Files: Weathered Texture – Dol Guldur texture – kilogram fontCreate new document in adobe illustrator, use the font kilogram and type “Graphic Design”, and keep every word in single line, play with the font size and spaces to make it look like rectangle, or follow the following settings.
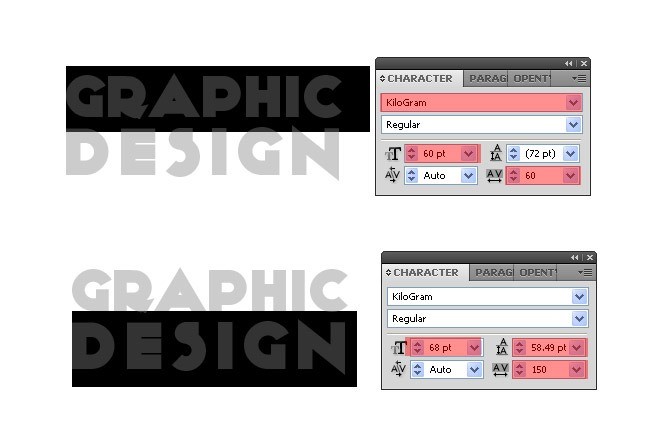
Step 02
Select the text by the Selection Tool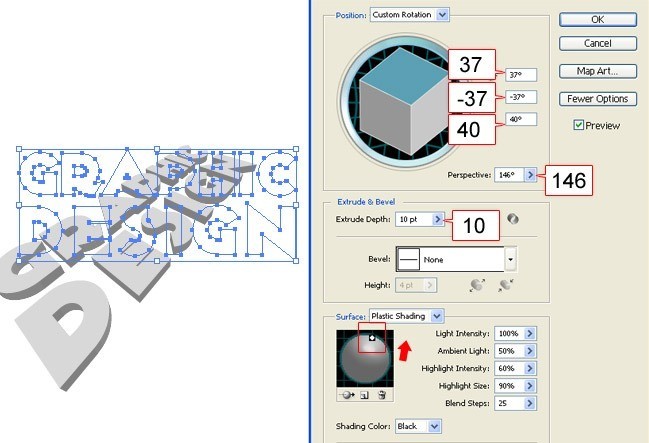
Step 03
Select the 3D Objects and choose Object >> Expand Appearance from the menu.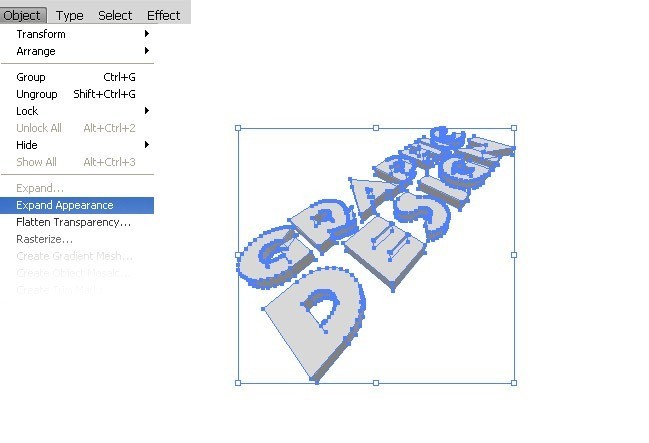
Step 04
Now Ungroup the 3D objects by hit Ctrl+Shift+G many times on the keyboard to ungroup every part, double click on the Magic Wand Tool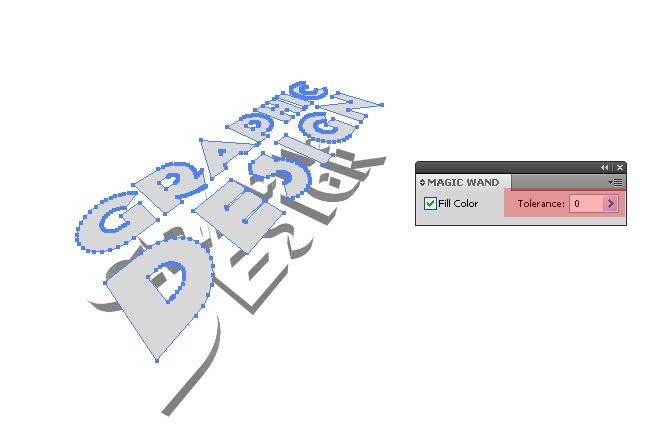
Step 05 – Photoshop
Create new document with size 1024*700.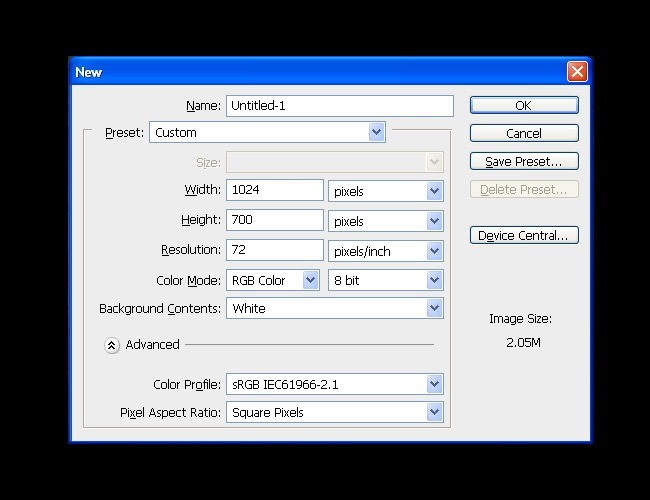
Step 06
load the texture “Weathered Texture” and re-size it to fit the file size and make the Fill opacity 65%, and rename the layer to BG.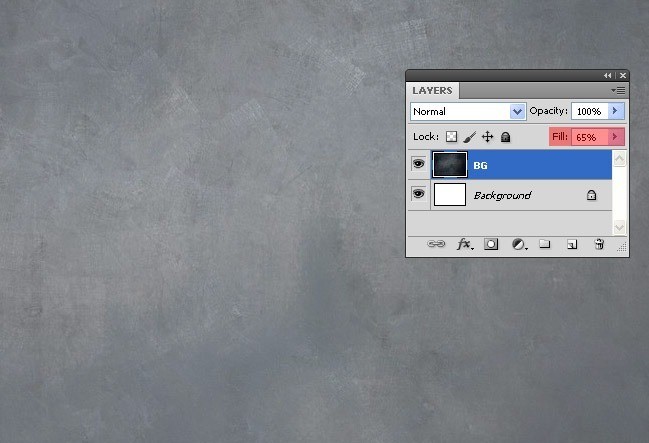
Step 07
load the texture “Dol Guldur texture ” also re-size to fit all the file size and make the Fill opacity 40% and the blend mode: Color Burn, and rename the layer to BG02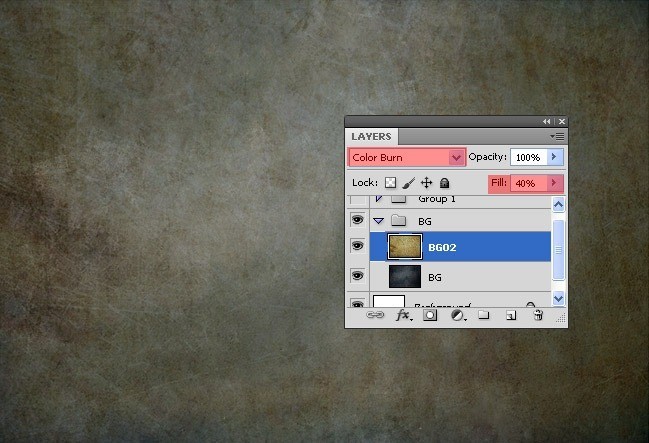
Step 08
Drag the 3d text from Illustrator to Photoshop, and keep in mind drag the upper part by it self and the below part by it self. and place them as Vector Smart Object, now select the two layers and re-size them to any size you like to work on,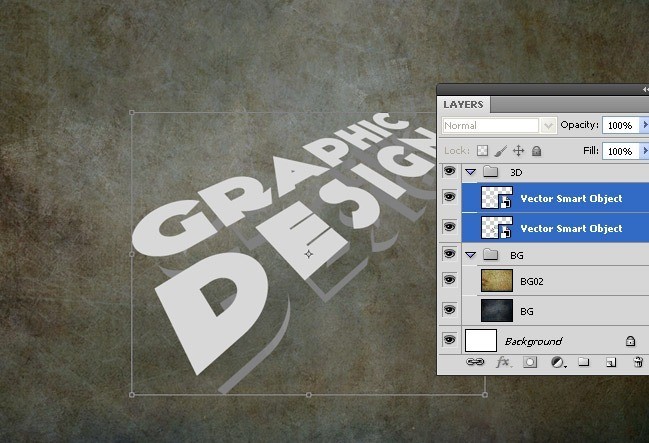
Step 09
Close this two shapes to each others an rename the lighter shape layer to Upper Part and the darker shape layer Below Part.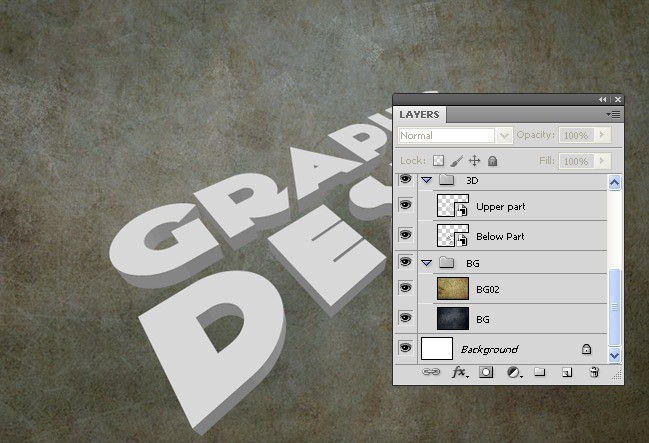
Step 10
Duplicate the the BG02 and clear the layer style by set the Fill Opacity 100% and the blend mode: normal, also decrease the size about 60% and move it to above of Upper part layer then press Ctrl + left click on the Upper part layer to make the selection.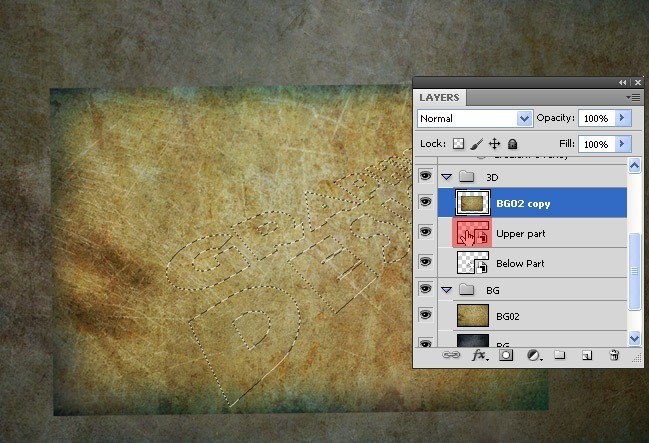
Step 11
Select the BG02 copy and click on the Layer mask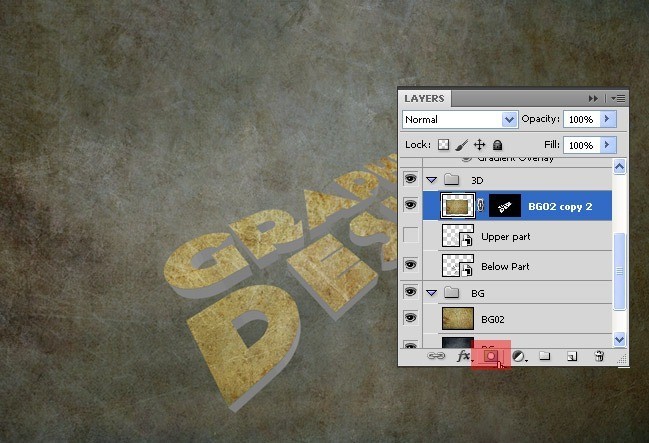
Step 12
Repeat the previous step on the Below part layer, but here we need to add some layer styles select the layer BG copy3 and select Layer>> Layer style>> Drop shadow.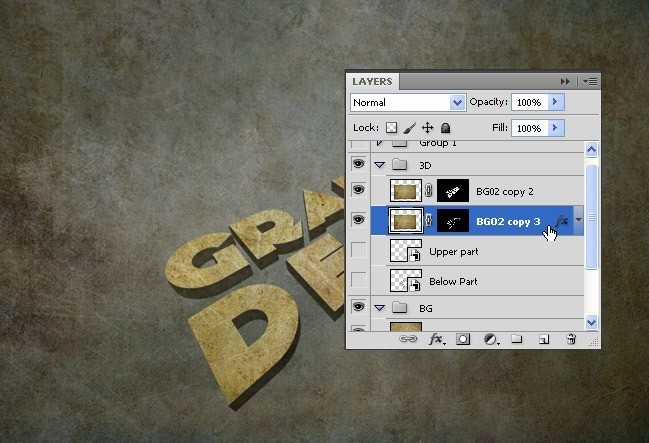
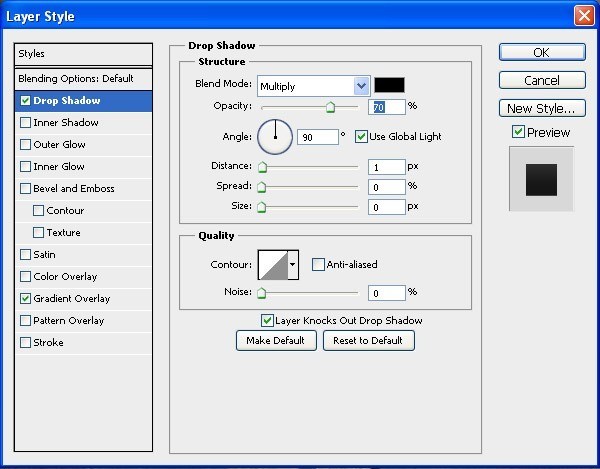
Select the Gradient Overlay set the below settings and click on the gradient
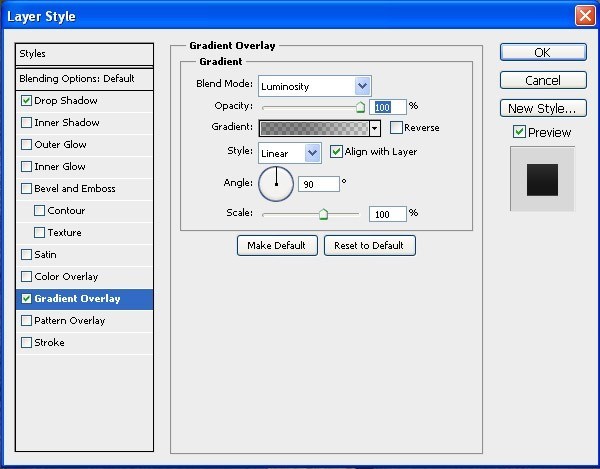
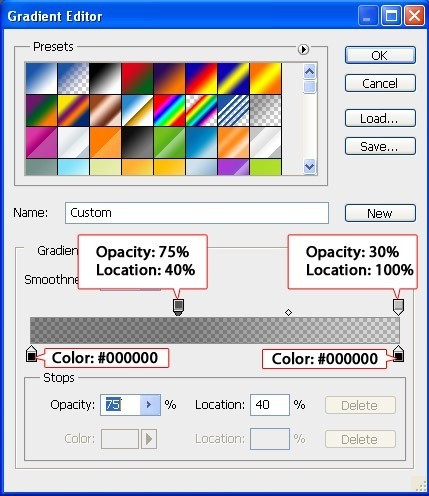
Step 13
Create new layer and fill it with black color and the opacity 60%, and select the Erase tool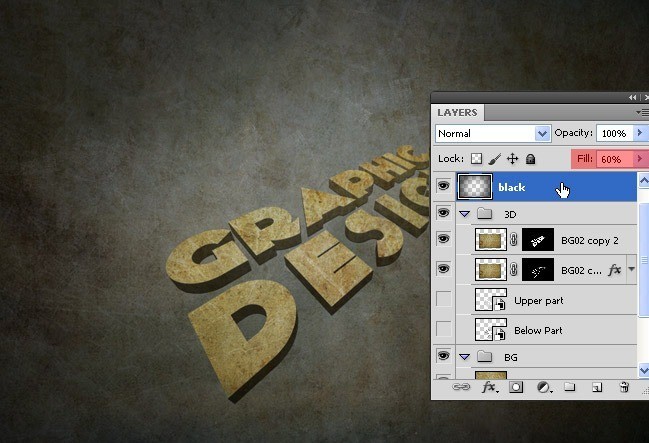
Step 14
Duplicate the Upper part layer and show it, then make the fill opacity 0% and add color overlay from layer>> layer style>> Color overlay, and set the color Black and the opacity 60%, now keep selecting the duplicated layer and hit Ctrl + T to transform the layer.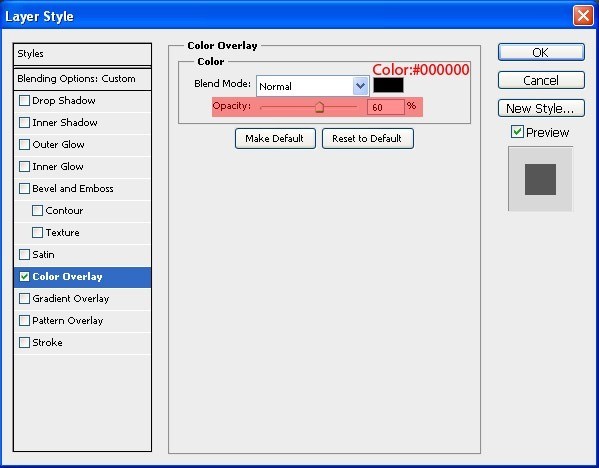
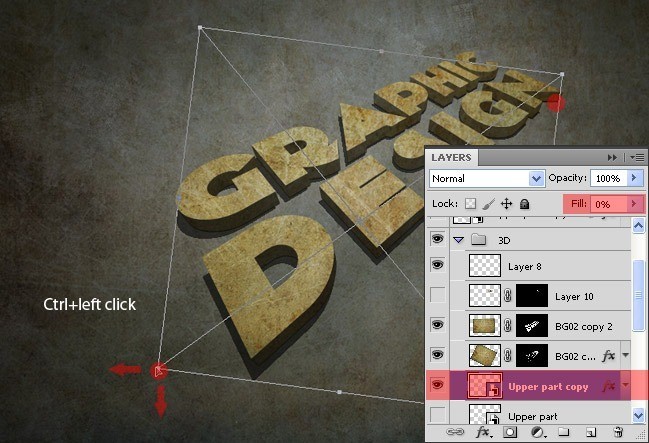
Step 15
Duplicate the Upper part again and follow previous step and change the opacity on the color overlay to 30%, and apply the Gaussian Blur and set the radios 2px.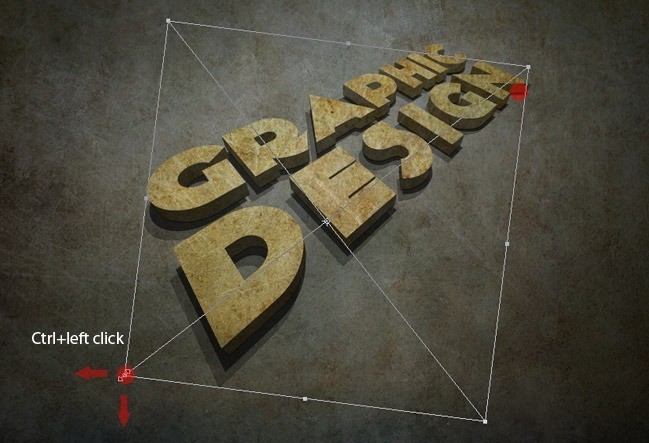
Final

Posted by , Published at 11:48 PM and have
0
comment

 m
m
No comments:
Post a Comment