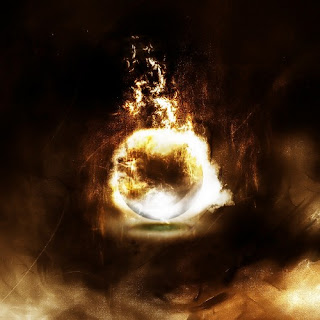
We will be using some drawing techniques, plus customer brushsets and filter effects along the way, plus I will show you a clever use of Photoshop brush to create special effect around the sphere.
Here is a preview of the final effect:

Ok Let’s get started!
Step 1
Create a new document sized 800 * 800px, fill the background with black colour. Create a new layer called “bottom light” and use a 250px soft round brush with white colour, do a single click in the centre of the canvas, then resize it (Ctrl + T) to a very thin shape as shown below:Grab the eclipse tool (U key) from the toolbox, create a new layer called “sphere” and draw a circle on top of the light, as shown below:
Drop Shadow
Step 2
Create a new layer on top of the “sphere” layer and use the eclipse tool to draw another oval shape to the top of the sphere. Name this layer as “highlight top” and change the blending mode to “overlay”, drop the opacity to around 40%.You will have the following effect:
Step 3
Now let’s add some irregular lighting effect to the sphere. Create a new layer just above the sphere layer, use a soft white round brush to so a few single click around the sphere, set the blending mode to “soft light”.Hint: make sure to paint some light on the bottom of the sphere, this will help adding more depth into the image.
The following effect is what I have so far: (the light strip on the right was done using the free tranform tool + a soft white round brush on a new layer with “normal” blending mode:)
Change the blending mode of the shadow layer to “overlay”, you will have the following effect:
Step 4
Now we can add some effect around the sphere to make it look mysterious. Use the abstract brushset 1 we downloaded, choose any one of them and reduce its brush size to a smaller size, paint around the sphere as shown below:(Hint: use the Free Tranform tool to distort, warp the new layer to create variations)
Here is what I have so far:
Make sure you mix different brushset and set the opacity and flow to both around 50%.
Step 5
Now let’s add the golden colour on the sphere. The trick here to add a Color Balance adjustment layer just above the original “Sphere” layer, with the following settings:Step 6
Now we can do some final touches to the image. Firstly let’s flatten the image, duplicate the background layer once and apply the following Radial Blur settings to the duplicated layer:Hope you enjoy it and find it useful! Until next time, have a great day!
Source: www.psdvault.com
Posted by , Published at 7:59 PM and have
0
comment

 m
m
No comments:
Post a Comment